For every homeowner with a basement, water damage is a nightmare. Waterproofing basement walls is an essential maintenance task that should not be overlooked! Whether waterproofing for the first time or just refreshing existing sealant, knowing what to do and what not to do can help ensure successful and long-lasting results.
This guide will walk you through waterproofing basement walls, highlighting the do’s and don’ts of performing this important task. Let’s get into it.
Signs You Need To Waterproof Basement Walls
Before you can waterproof basement walls, it’s important to determine whether you need to do so in the first place. Here are some key signs that suggest waterproofing is needed:
- Musty Odors: If your basement has a musty odor, moisture is likely getting into the walls.
- Mold or Mildew Growth: Mold and mildew growth can indicate high moisture levels entering basement walls.
- Stains: Stains on the walls can suggest water intrusion as well.
- Efflorescence (White Crystals): White crystals on the walls, floors, and other surfaces may form in wet basements, indicating moisture is present.
- Bowed Walls: This can be a sign of hydrostatic pressure pushing in from the outside that needs to be addressed with waterproofing.
- Condensation: Pipes, windows, and other objects can become covered with condensation in damp basements.
- Humid Air: If the air in your basement feels unusually humid, it could indicate water infiltration.
When Is Waterproofing Basement Walls DIYable?
Identifying the root of the basement moisture problem is crucial before taking any action. If a DIYer can pinpoint the exact source of water intrusion and it’s not too extensive, they could take on the job. Calling professionals may be necessary if there are signs of mold or mildew.
DIYers should not attempt basement waterproofing with an existing sump pump. If the water table is high, it’s possible that hydrostatic pressure can push water through even well-sealed walls and floors. When dealing with high-water tables, sump pumps should be installed first as part of any waterproofing solution.
Also, you should assess the condition of their walls before waterproofing. Repairs may be necessary before applying a waterproofing membrane if any cracking or crumbling has occurred.
DIYers should consider the complexity and scope of the project. Depending on the size of the basement, access to all corners may not be straightforward. If it’s a particularly large space, you should consider the cost of rentable equipment and materials compared to what would be spent for professional labor.
DIY Steps For Waterproofing Basement Walls
Depending on the moisture levels in your basement, there are several steps you can take to waterproof the walls. Here’s a quick overview:
1. Initial Inspection
Before you begin waterproofing your basement walls, it’s important to do an initial inspection. Remove coatings and old paint with a wire brush, sandblaster, or other methods. Also, wearing protective gear is necessary when removing paint.
Use a scrub brush and warm water with a little dish soap to wash off dirt and dust from the walls. If you spot any mold, add one cup of bleach per gallon of water to your cleaning solution. Make sure the soap does not contain ammonia, as it can be hazardous when mixed with bleach. After washing, rinse the walls and allow them to dry completely.
2. Preparing for Waterproofing
Once your basement walls are clean, you’re ready to waterproof them. Look at the products you have chosen and read the instructions carefully. Some will require priming or other preparatory steps. Clean any surface with a strong degreaser to remove oils, sealers, and other contaminants.
Also, for standing water problems, you might need to install a sump pump or French drain. If this is the case for your basement, call in a professional.
3. Plug Holes and Cracks
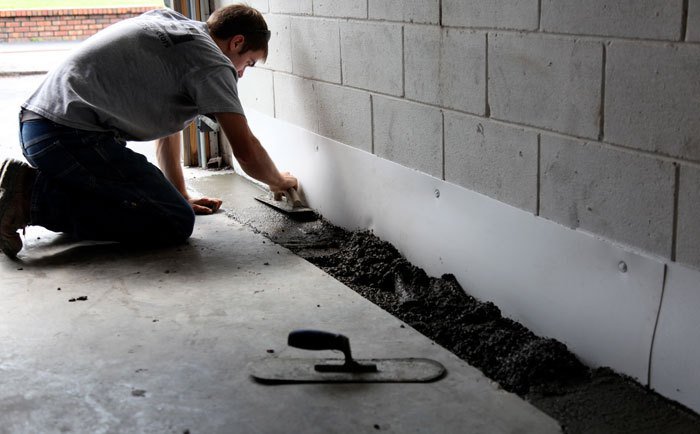
If your basement walls contain any holes or cracks, it is important to plug them in before you begin the waterproofing process. Start by filling large holes with mortar and small ones with silicone-based caulk.
Then inspect for any remaining leaks, seal them up with more caulking, and make sure all areas are completely dry before continuing. Also, if you find any cracks that are wider than ¼ inch, fill these with a concrete patch. For larger cracks, use hydraulic cement.
4. Applying Waterproofing Coating
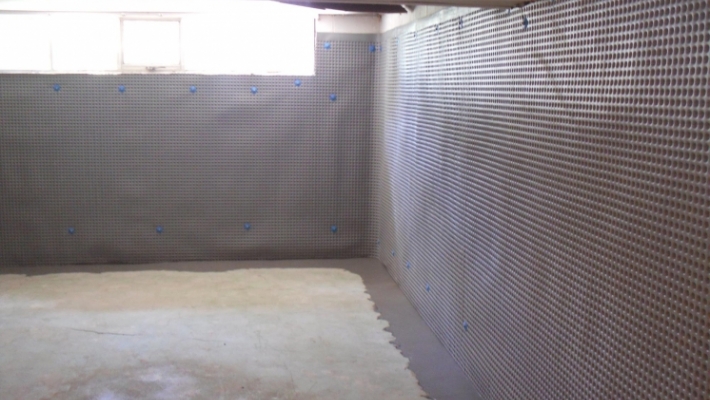
After plugging all the holes and cracks, you can apply the waterproof coating to the basement walls. Follow manufacturer instructions carefully when it comes to mixing and applying the product. Allow sufficient time for drying after each coat has been applied before you start the next one.
Also, ensure you cover the masonry walls completely, and don’t forget to apply the coating to the top of the wall, underneath any trim or molding. Check for any leaks around pipes and seal them as needed.
5. Finishing Touches
Once the waterproofing coating has been applied, you can finish by painting or sealing the basement walls. This will help to protect them from further moisture and damage. You can use a concrete sealer or an epoxy-based waterproofing paint for extra protection.
By following these steps, you’ll be sure to have a dry, safe basement with interior waterproofing. With the right materials and techniques, you can waterproof your walls effectively.

Dos and Don’ts of Waterproofing Basement Walls
Some tips and tricks for waterproofing your basement floor and walls will help keep moisture from causing foundation damage. Here are some do’s and don’ts of waterproofing basement walls:
Do: Determine The Source Of Water Before Waterproofing
The most important step in waterproofing your basement walls is to determine where water is coming from before you start the process. If water seeps into your basement during periods of heavy rain, it may be necessary to inspect and repair gutters and downspouts.
Don’t: Make Repairs Without Dealing With Water Source
By dealing with the water source first, you can avoid creating costly problems that may require more work and expense. Begin waterproofing your basement walls without locating the water source and taking steps to mitigate it. You may find yourself in a situation where repairs are needed again soon after. Also, improper waterproofing can cause the water to back up and create problems in other areas of your home.
Do: Install Quality Drainage System
The best way to keep water from seeping into your basement is to install a quality drainage system that will divert the water away from your home. This system should include an interior drain, exterior drain, sump pump, and possibly a dehumidifier to help keep the air dry. Also, it’s important to clear leaves and debris from gutters regularly to ensure proper drainage.
Don’t: Skimp On Quality Materials
When waterproofing your basement walls, you must use quality materials. Cheap or inferior materials will not last as long and may require more maintenance or even replacement in a short period. Investing in top-of-the-line waterproofing materials can save you money in the long run and will help protect your home from water damage.
Do: Use The Hydraulic Cement
For cracks in your basement walls, use hydraulic cement to seal them and prevent water from seeping in. Hydraulic cement is a special concrete that expands when it dries and helps form an effective barrier against water. Also, make sure any concrete repair you do is done properly and that all cracks or holes are filled in.
Don’t: Forget To Check For Leaks Regularly
Regular maintenance will help ensure your basement walls remain waterproofed and free from leaks. Keep an eye out for water stains on the walls, leaky pipes, and musty odors, all of which could signify that your basement needs some attention. Taking action right away can help prevent costly water damage in the future.
Do: Monitor Basement Humidity
High humidity levels can cause mold and mildew in your basement, so keep the humidity level in check. Investing in a dehumidifier or other moisture-reducing devices can help keep the air dry and prevent problems from occurring. Keep an eye on your basement’s relative humidity and ensure it stays within a healthy range.
Don’t: Forget To Address Window Well Leaks
For homeowners with basement windows, it’s important to ensure the window well is sealed properly and free of any water that can seep in. Checking the window well regularly and taking steps to ensure it remains leak-free will help prevent future issues.

FAQs
1. How Long Will DIY Basement Wall Waterproofing Last?
The longevity of your basement waterproofing system depends on the hydrostatic pressure groundwater exerts from the exterior. Generally, it should last for at least 10 years, but if it fails prematurely, you may need to install a drainage system, change the grade of the foundation, or, in more extreme cases, excavate and fit a waterproof membrane. To ensure the job is done properly and efficiently, hiring a professional for such work is recommended.
2. Can You Apply Sealer Over Painted Walls Or Efflorescence?
No, applying a sealer over painted walls or efflorescence is not recommended. Painted walls are porous, making them more likely to absorb the sealant and create moisture-retaining pockets on the surface. Also, it can cause even more damage as it prevents the evaporation of existing moisture in the walls. Similarly, efflorescence is a crystalline deposit of salts left behind by evaporating water and can cause even more damage if sealed over with a waterproofing material.
3. How Do You Approach Exterior Waterproofing?
If you live in an area with high moisture levels, you may also consider waterproofing the exterior of your basement walls. This is a bit more involved, as it involves excavating the soil around your home’s foundation, applying a waterproof membrane, and then backfilling with new soil. It can also be quite expensive, but if done correctly, it can effectively waterproof your basement walls. Please research and ensure you are working with a reputable contractor who understands the process and will guarantee their work.
Conclusion
Following the steps above can help prevent water damage in your basement and protect your home from costly repairs. Investing in waterproofing measures now will save you time, money, and stress in the long run. With proper care and maintenance of your basement walls, you’ll enjoy a dry, comfortable atmosphere for years to come. Don’t wait until water seeps into your basement—take action now before it’s too late!


