For many homeowners, installing a moisture barrier in the crawl space is essential to protecting their homes from water damage. Not only can it prevent rot and mold growth, but it also helps to keep energy costs down and create a more comfortable living environment.
This guide will provide an overview of how to install moisture barrier in the crawl space and discuss some of the problems caused by having moisture in the crawlspace. From preparing the space to properly installing the barrier, we’ll ensure you feel confident in taking on this project. Let’s get started.
Problems Caused by Crawlspace Moisture
Moisture is one of the main reasons why crawl spaces should be equipped with a vapor barrier. While moisture alone won’t cause major structural damage to your home, it can lead to serious problems if not addressed properly.
1. Mold And Mildew
Exposure to moisture can lead to mold and mildew in your crawl space, which can cause health issues such as allergic reactions and respiratory illnesses. Also, mold can cause costly damage to your home, leading to expensive repairs.
2. Wood Rot
Moisture in the crawl space can also lead to wood rot, which is when the wood of your house starts to decay and disintegrate due to exposure to moisture. This can be a major problem if not addressed because wood rot weakens the structure of your home.
3. Insect And Rodent Infestations
For the same reason, moisture in the crawl space can lead to insect and rodent infestations. The insects and rodents are attracted to the moist environment and can start breeding and creating a major problem for you. These infestations can be troublesome if not addressed properly, from minor nuisances to health risks.
4. Structural Damage
Excessive moisture can also lead to structural damage in your homes, such as weakened beams and floor joists. This can be especially problematic if the structural components cannot hold up the house’s weight.
How Do Vapor Barriers Work In Crawl Spaces?
Vapor barriers are an integral part of any home. They are a barrier between the warm, moist air inside the home and the cold, dry air outside. A vapor barrier prevents moisture from passing through foundation walls, floors, and ceilings, thus reducing the risk of mold growth. By creating a more consistent temperature in the crawl space, vapor barriers can also help to keep the space from becoming too hot in the summer and too cold in the winter.
They are beneficial for controlling water vapor. Creating an impenetrable barrier between the interior and exterior of your home prevents moisture from entering through walls, floors, and ceilings. This helps to reduce the chance of mold growth in the crawl space and ensures a healthy indoor environment.
Also, you can find vapor barriers that are specifically designed for crawl spaces. These often have an added layer of insulation which helps to keep the area cooler in the summer and warmer in the winter while also reducing noise levels.

What Materials Will You Need?
Before starting your project, there are a few basic materials you’ll need to gather. These include:
1. Vapor Barrier Sheeting
The most important material in this project is the vapor barrier. This will be the main defense against moisture in your crawl space. Look for a product designed specifically for crawl spaces, such as an 8-mil polyethylene sheeting with UV protection and an anti-microbial finish. Also, the tensile strength should be strong enough to handle any weight that might be placed on it. Rigid insulation is also an option for those looking for moisture-proof insulation.
2. Sealing Tape
To ensure a tight seal, you’ll need to get some double-sided tape capable of adhering to the vapor barrier material and the foundation wall of your crawl space. Make sure you select the right type of tape for the job, as some types can be difficult to remove later.
3. Fasteners
You’ll need some fasteners to secure the vapor barrier in place. A product like plastic anchors and screws will secure the material against wood or concrete surfaces.
4. Other Tools
In addition to these materials, you’ll want to have some basic tools on hand, such as a measuring tape, a utility knife, and scissors to cut the vapor barrier. You may also need an electrician’s stapler or pliers if you install any electrical lines while in the crawl space. Also, a caulk gun, sealant, and a paintbrush may be necessary for caulking any cracks or gaps.

Steps To Install Crawl Space Vapor Barrier
From selecting the right materials to ensuring that you’re installing the barrier correctly, here are the steps you need to know about installing a moisture barrier in most crawl spaces.
Step 1: Assess The Crawl Space
Start by assessing the crawl space with an eye toward moisture. Check for signs of dampness or standing water since this could mean that you must take extra measures, such as waterproofing, before installing your vapor barrier. Also, check for any structural damage, mold, or mildew.
Step 2: Lighting
You’ll need to install proper lighting in the crawl space for safety and convenience. This will help you navigate the area more easily when installing your vapor barrier and allow you to inspect for any issues or damage. Also, check the electricity and make sure it’s up to code.
Step 3: Cleaning And Preparation
Next, you’ll need to clean the area and prepare it for installation. This includes removing debris or clutter and patching up any holes, cracks, or other openings that could allow moisture seepage. When dealing with a particularly damp area, you may also consider waterproofing the crawl space before installing the vapor barrier.
Step 4: Measurements And Cutting
Now it’s time to measure and cut the vapor barrier. Make sure you take your measurements carefully, as you want your vapor barrier to fit snugly against the walls of the crawl space with no gaps or openings. This will ensure that moisture is blocked from entering the area. Also, use sharp scissors to avoid tearing if you use plastic sheeting.
Step 5: Installing The Vapor Barrier
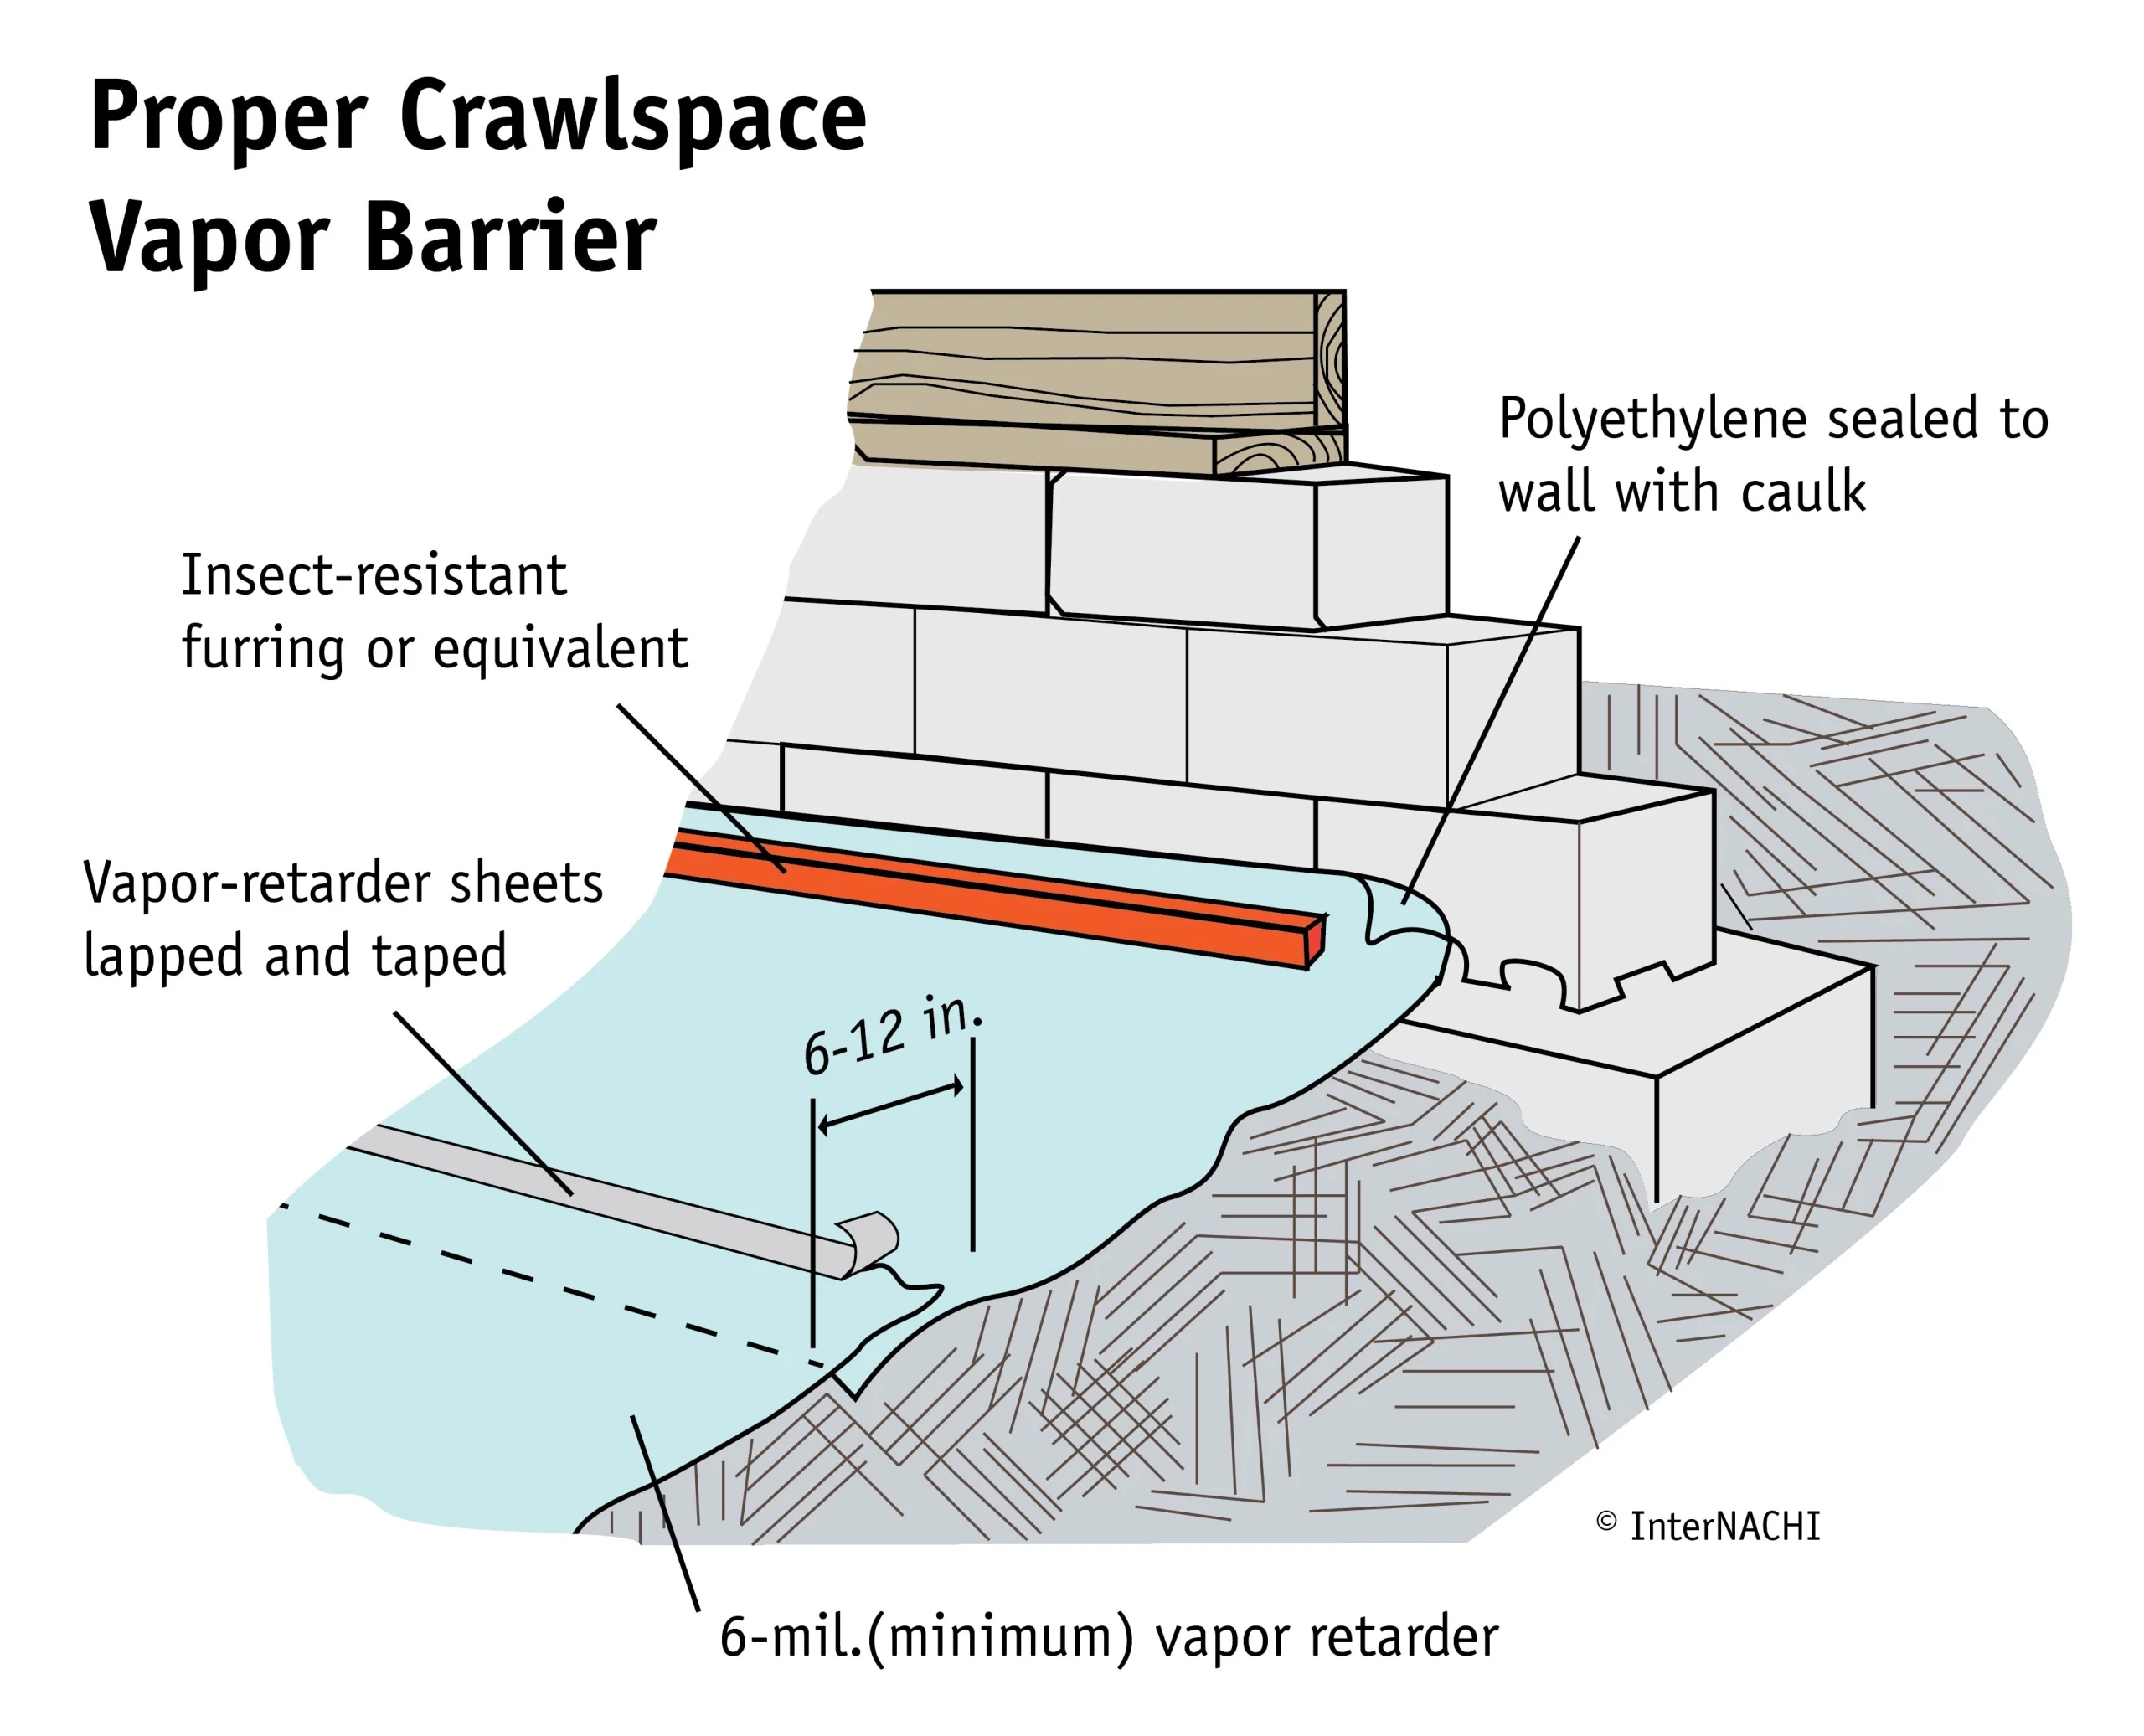
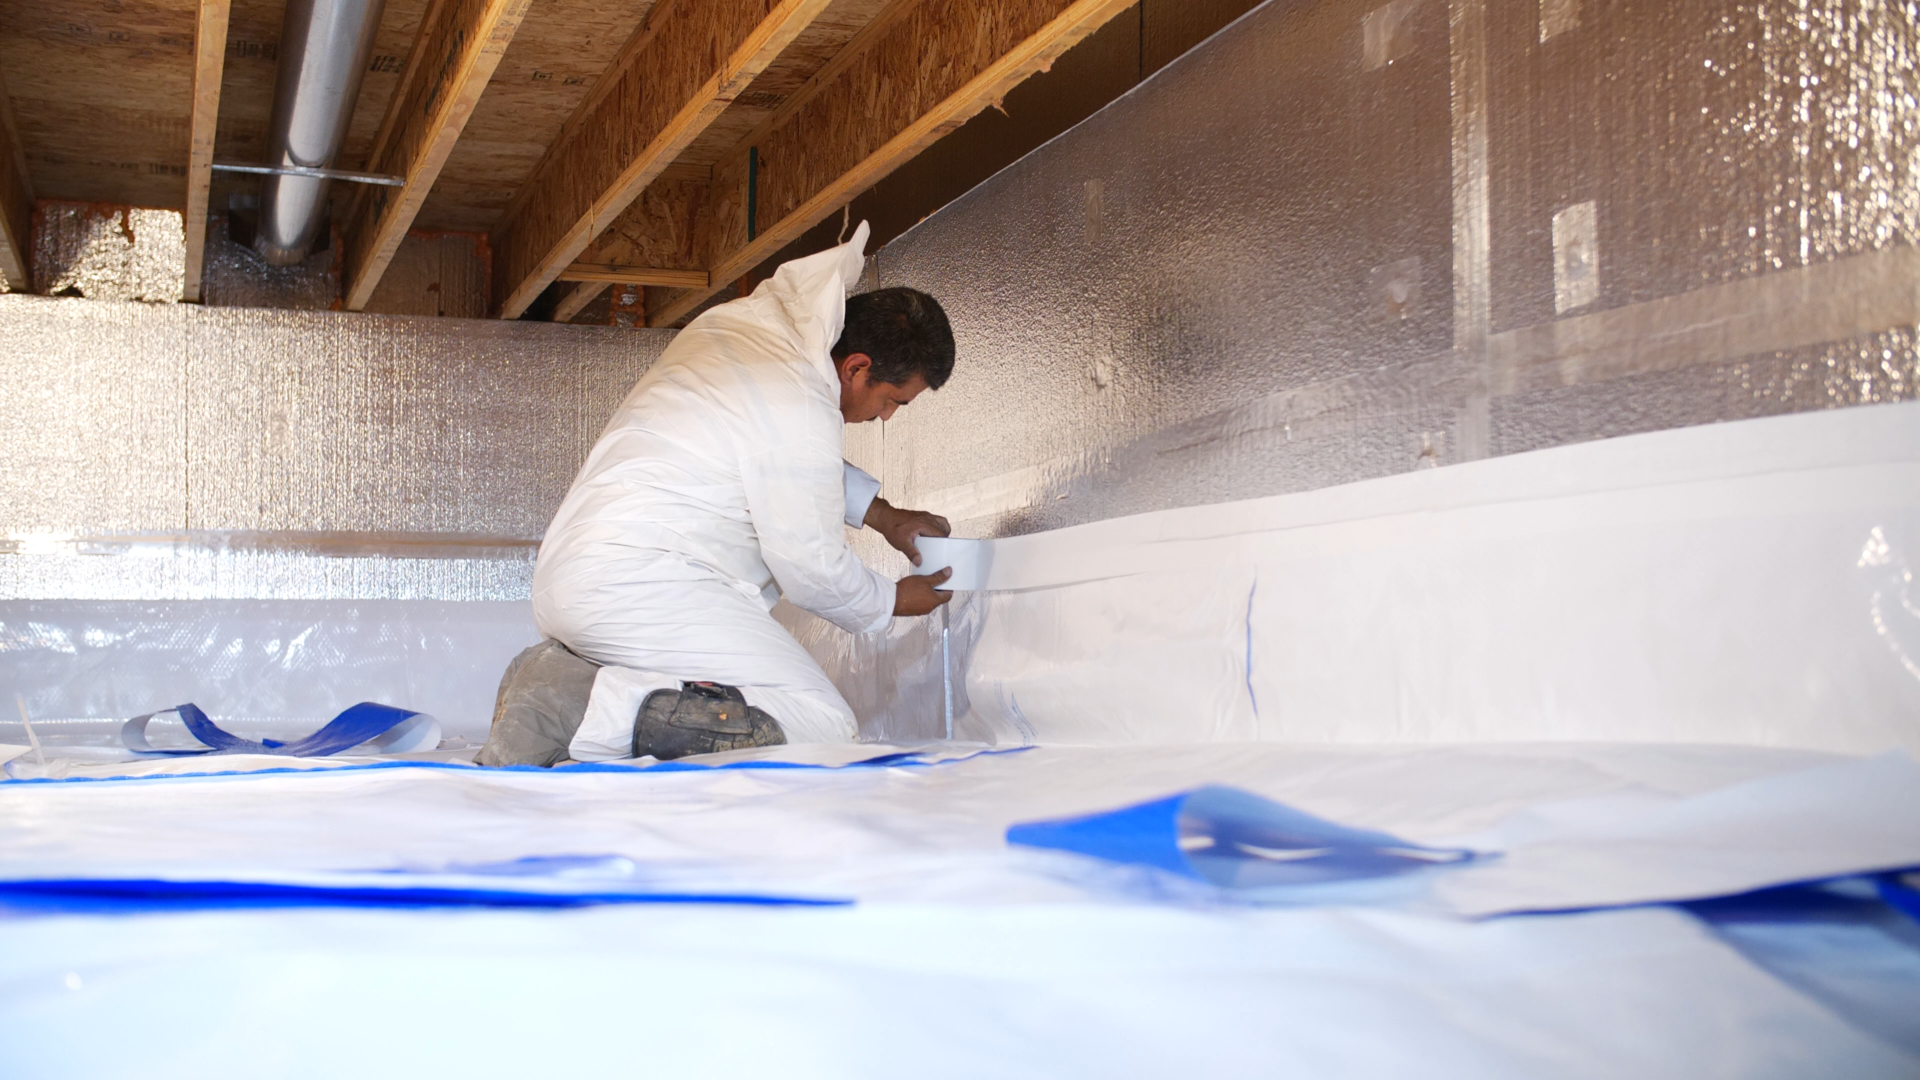
Once you have your vapor barrier cut to the right size, installation is easy. The main areas you’ll need to focus on are the walls and floor of the crawl space. Use tape or staples to attach the vapor barrier to the walls, ensuring that all seams are sealed.
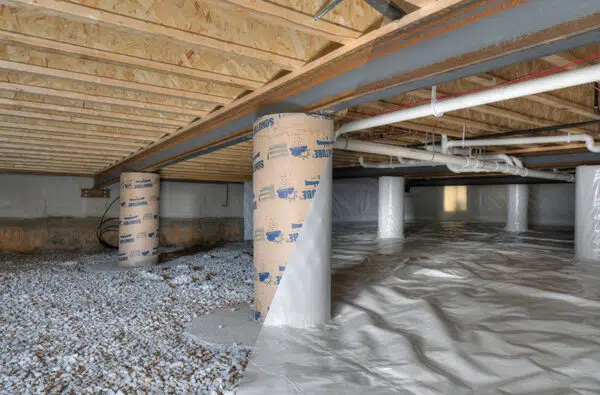
Start by covering the crawl space floor with a 6 mil polyethylene sheet, overlapping each piece at least 12 inches from corner to corner, and using construction staples or nails to secure it. For the walls, use overlapping pieces with at least a 12-inch overlap to ensure maximum coverage. Once the vapor barrier is in place, use tape or adhesive to seal any seams and ensure no moisture can get through.
Step 6: Finishing Touches
Once you’ve installed your vapor barrier, you’ll need to ensure it’s securely in place. As needed, check for any tears or gaps and seal them with tape, adhesive, or staples. You may also want additional insulation on the barrier to ensure optimal protection from crawl space moisture and heat loss. Ensure that all edges are taped down to prevent movement and that all seams are sealed.
Step 7: Air Conditioning
You may consider installing an air conditioning system in your sealed crawl space for extra protection. This will further control moisture entering the area and provide additional temperature control. Carefully research your options before settling on a unit that will work for you.
Step 8: Final Inspection
Once all the above steps have been taken, you’ll need to inspect the area one last time. Check for any signs of moisture, such as standing water or dampness along the walls and floors. Also, ensure that all edges are properly sealed and taped down and that the vapor barrier is securely in place with no tears or gaps.

FAQs
1. What Type of Plastic Sheeting Do I Need for a Vapor Barrier?
The type of plastic sheeting you need for a vapor barrier depends on the climate and your budget. Generally, 6-mil polyethylene sheets are recommended for most climates. If you live in a cold region, thicker 10-15 mil plastic is better because it will protect against moisture and cold air from entering the crawl space. For extra durability, you can also use thicker plastic sheeting reinforced with a fabric scrim.
2. How Do I Secure The Vapor Barrier?
You can secure the vapor barrier in your crawl space using anchors, tape, and other materials. For example, you can use plastic anchors to attach the sheeting to concrete walls or floors. You can also use two-sided tape to secure the sheeting around pipes, cracks, and seams.
3. Is Maintenence Necessary After the Installation?
It is important to check your vapor barrier periodically for any cracks or tears. If you find any, seal them with two-sided tape or a repair kit specifically designed for plastic sheeting. In addition, make sure that the anchor points are still secure. This will ensure that your vapor barrier protects against moisture and cold air.
4. Does The Installation Of A Vapor Barrier Improve Energy Efficiency?
By preventing cold air from entering your crawl space, the temperature in your home will be more regulated, and you won’t need to use as much energy to keep it comfortable. This can lead to lower energy bills and improved overall energy efficiency.
5. Are There Any Downsides Of The Vapor Barrier?
The main downside to installing a vapor barrier is the cost. It can be expensive, depending on the crawl space size and the type of materials you need. In addition, if not installed properly, it may not provide adequate protection against moisture and cold air. It is important to ensure that the vapor barrier is securely installed and regularly checked for damage to prevent moisture problems.
Conclusion
With your vapor barrier in place and properly sealed, you’re ready to enjoy the benefits of a dry, comfortable crawl space. With the steps mentioned to install moisture barrier, you can ensure that your home is protected from moisture and heat loss. Installing a vapor barrier will provide numerous long-term benefits, from helping to reduce allergens and improving air quality.
Installing your vapor barrier is easy, affordable, and provides proven results that can help save money on energy bills in the future. Get out there and install your vapor barrier for a healthier, happier home!
Happy installing!


