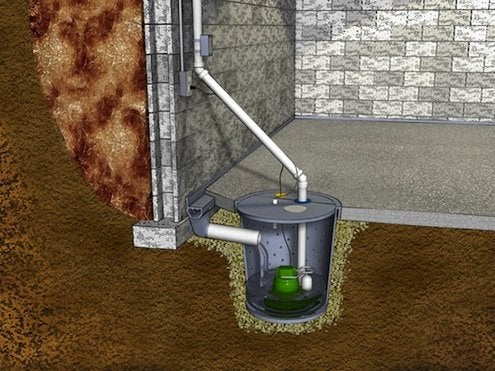
Having water in your basement is never any fun. Not only is it a pain to clean up, but it can also lead to more serious problems like mold and mildew. With a submersible float switch sump pump, you can quickly and easily remove water from your basement before it causes any damage.
This guide will show you how to install sump pump in your crawl space. From finding the perfect location to making the connections, we’ll help you get your pump up and running in no time. Let’s get started.
What You’ll Need
To install a sump pump in your crawl space, you’ll need the following materials:
- Sump Basin: This is the container that will collect the water. It should be large enough to hold at least 10 gallons of water.
- Pump: The pump will need to be powerful enough to move the water out of the sump basin and away from your home.
- Pipe: This will connect the sump pump to the discharge point.
- Check Valve: This will prevent the water from flowing back into the sump basin once it has been pumped out.
- Discharge Point: This is where the water will be drained to. It can be a sewer line, a dry well, or even a low point in your yard.
- Plumbing Materials: You’ll need basic materials like fittings, clamps, and sealant.
- Drain Tile: This is optional, but if your crawl space is prone to flooding, you may want to install drain tile around the perimeter of the space. This will allow water to drain into the sump basin without going through your home.
12 Steps For Crawl Space Sump Pump Installation
After gathering all the necessary tools and materials, you’re ready to begin installing the sump pumps in your crawl spaces. Follow these easy steps, and you’ll have it done in no time.
1. Prepare Your Crawl Space
First, you’ll need to clear out debris or standing water in your crawl space. It will help ensure that your sump pump can do its job properly. Have a shop vac or other wet or dry vacuum on hand to make cleanup a breeze. Also, ensure that any cracks in your foundation are properly sealed to prevent future flooding. While at it, check the drainage around your home and ensure it is directed away from the foundation.
2. Choose The Sump Pump Location
Once your crawl space is clear, it’s time to find the lowest point. This is where you’ll want to install your sump pump so that it can effectively remove water from the area. Also, keep in mind that you’ll need to have an outlet nearby so that you can plug in your pump. If there isn’t an outlet close by, you may need to have an electrician install one.
Choose an area with easy access for servicing and ensure nothing is blocking the path of the discharge hose. The perfect location for your sump pump will have about 2 feet of space on all sides. Also, ensure the area you choose is large enough to accommodate the size of the sump pit you need.
3. Plan Drain Tile Layout
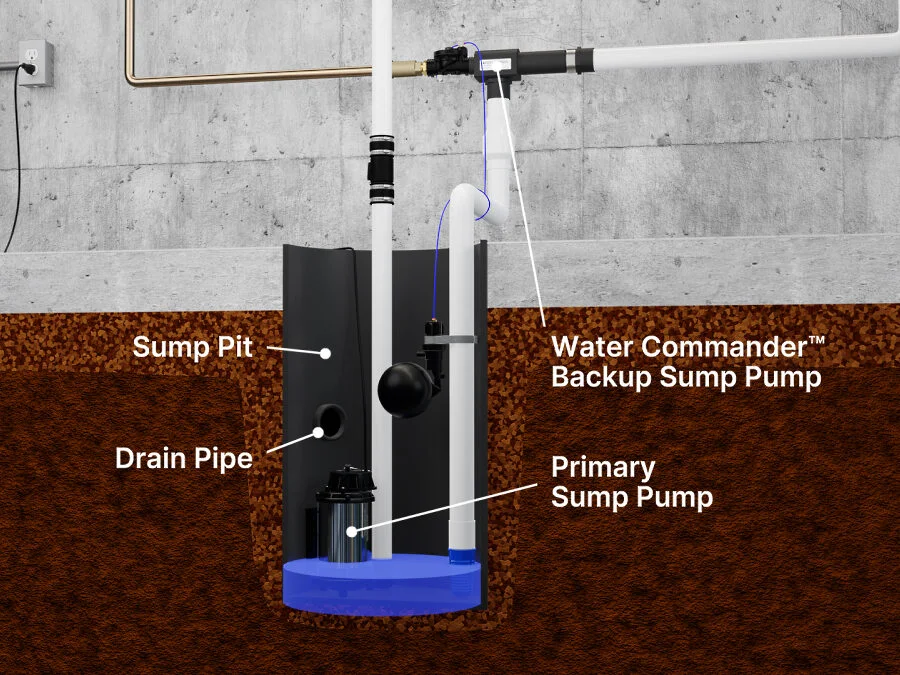
Though not necessary, using drain tile around your sump pump will help water drain more quickly from a larger area. Entering the sump pit or basin is how water will flow into the space for a sump pump system. Most sump pits have a lid to cover the basin, which provides extra safety and practicality. It’s possible to drill holes into the lower portion of the sump basin so that water can enter while still allowing the benefits of a covered system.
Adding the drain tile to your sump pump system will help drain more distant areas and carry that water back to the sump basin. This is especially useful if you have a lot of water concentrated in one area of your crawl space.
To set up the drain tile, start by deciding which areas you want to drain. Then, install corrugated or solid drain tile back to the sump basin from these areas. A corrugated pipe system is a good option because it can be easily expanded if needed.
4. Dig Sump Basin Hole And Trench For Drain Tile (If Using)
Next, you will need to move to the installation process. Begin by drilling holes in the side and bottom of the sump basin, allowing direct water drainage into and out of the basin during dry periods. Then, create trenches for drain tiles; if you use them, make sure to slope the trenches towards the basin location so that water will flow easily into them. Then, place rock aggregate around and under the sump basin and drain tiles to help with the water passage. If there is not already a penetration in the sump basin, this will also need to be drilled.
Parallel to the foundation wall, place the sump basin 12 – 18″ away from the foundation. Dirt should not be disturbed next to foundation walls or footings, and do not dig under these structures as this can undermine the support for your foundation and risk structural collapse. Generally, you should stay the same distance away from the footing as the height of that footing.
5. Prepare The Sump Pump Basin
Several sump basins are ready to use as purchased. For those that are not, you will need to add holes to the sides of the basin if not already present. This allows passive water movement into the basin without the aid of a drain tile. If you plan to use drain tile, check for drain tile access holes at the sides of the basin. If they are not present, you will need to cut the appropriate size hole in the sides of the basin to allow for the passage of the drain tile pipes. Try to make the holes close to the same size as the pipes.
Check to see if you can get the sump basin into the crawl space through your access. Sometimes, the access may be too small for a full-size sump basin. If this is the case, you may need to cut the basin into two halves and reassemble it once in the crawl space.
For those that need to cut the basin in half, you will need to attach 1/4″ aluminum stock and the waste discs from the tile access holes (they work perfectly as their profile matches the curve of the basin) with stainless sheet metal screws to one of the two halves before placing it in the crawl space. This will allow for easy reassembly of the sump basin.
6. Install The Sump Basin
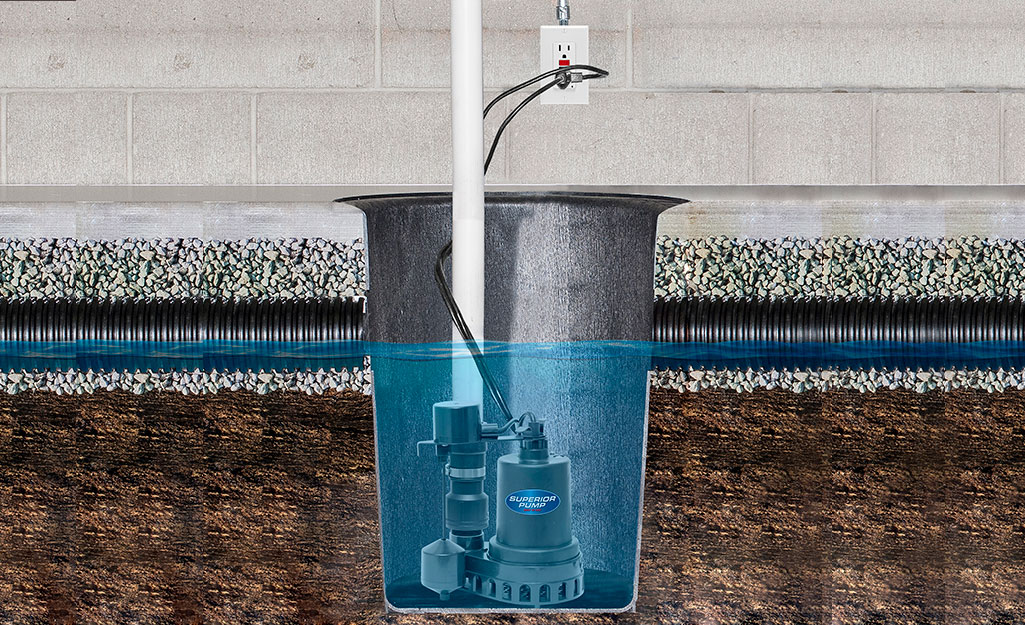
Next, place the sump basin in the hole on top of the aggregate layer. Ensure the basin is level so water can flow evenly into it. Then, connect the drain tile pipe to the sides of the basin. The pipe should fit snugly against the basin to prevent any gaps where water can escape.
Now, it’s time to fill in the trenches with aggregate. This will help to keep the basin in place and prevent any erosion. Start by filling in the space around the sump basin and then work your way out to the edges of the trench. Once the trenches are filled, cover the drain tile with an aluminum screen or a fabric sock. This will help to keep small pieces of aggregate from entering the pipe and clogging it.
7. Install Sump Pump
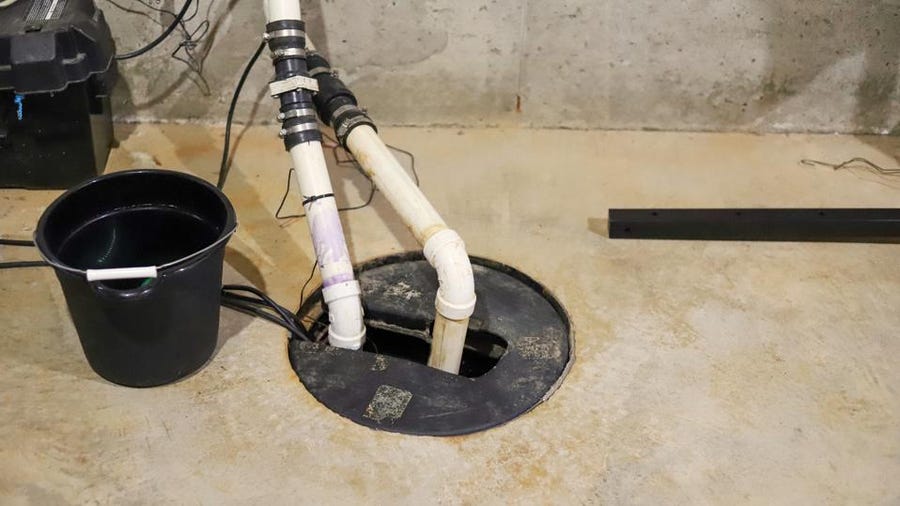
Next, you will need to install the sump pump itself. You can do this in a few different ways, but the most common method is simply placing the pump in the sump pit. Ensure the pump is level and secure, so it does not move around during operation. Use PVC pipe to connect the discharge port on the sump pump to the remainder of your drainage system. Make sure that all connections are tight so that there are no leaks.
Drill a small hole in the side of the discharge pipe at a level just above the top of the pump. This will allow drainage of the discharge system after the pump cycle is complete.
Then, place the check valve in the discharge pipe above the drilled hole. This will prevent water from draining back into the sump pit after the pump has turned off. Clean debris or sediment from the sump pit so it does not clog the pump.
Also, your sump pump will be at the bottom of your basin. It will discharge any water that accumulates in the basin. A float switch activates most pumps. So, the pump will only start when the water level in the basin is high enough to trigger the float switch.
8. Attach Sump Cover And Connect The Sump Discharge Plumbing
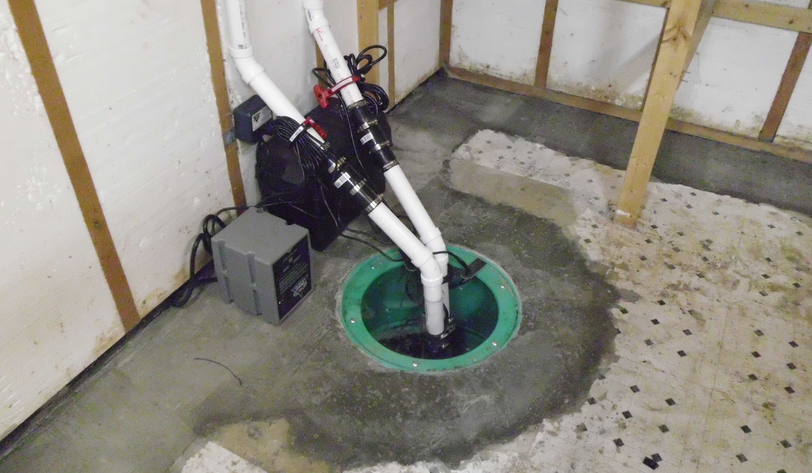
Next, attach the sump cover to the basin using the supplied bolts or screws. Make sure to use the rubber seal that comes with the cover to create a watertight seal.
Now it’s time to connect the discharge plumbing for the sump pump. Pass the tubing or piping through the sump basin cover and attach it to the combination union and check valve. To prevent backflow, the rubber fitting on the union pr check valve provides a breakpoint for the discharge plumbing.
Pass the power cord for the sump pump through the basin cover and connect it to a suitable power supply. Use the supplied rubber seals to create a watertight seal around the cord.
9. Install Vent Plumbing And Connect Power Cord
Venting the basin is important and may be required by state and local plumbing codes. To vent the sump, use a 1.5″ PVC pipe with a rubber coupling to serve as a disconnect if needed. The drainage pipe should pass through the sump cover and vent the basin to the outside air. The discharge and vent pipes should be run to the desired point outside the house.
10. Get Done With Ground Work
Use aggregate, like pea gravel, for the topmost layer. Level the ground over the drain tile and around the sump basin. Allowing the easy passage of water through will help the drain tile and sides of the sump basin work more effectively.
11. Complete The Discharge Plumbing Circuit
To install a sump pump in your crawl space, you must plan for your desired discharge plumbing path. If passing the plumbing to the outside of the home, you may need to cut a hole through the home wall. For outside, you can add a rodent screen (PVC drain guard) to the vent circuit and a right-angle hose attachment fitting to the discharge circuit.
It will temporarily direct discharge water away from the house. You can also create a drain system for use with the rain gutters that you can direct this discharge water to as well. To finish, seal the passage holes with exterior caulk.
12. Connect To Power Supply And Test
Last but not least, you’ll need to connect your sump pump to a power supply and test it to ensure it’s working properly. Most pumps require a 20 amp circuit and should have ground fault circuit interruption (GFCI) protection. Be careful not to run the pump for any period without water, and you can open the cover of your sump basin and lift the pump trigger to test it. If everything is in working order, the pump should start and move water out of the basin through the discharge plumbing.
Conclusion
Follow these steps and have your sump pump installed in no time. They are an important part of protecting your home from flooding, so make sure you do it right. Maintain your sump pump setup and keep it in good working order, and your home will be safe for years to come.
Please contact a professional contractor if you have any questions or need help installing your sump pump. Do not attempt to install a sump pump if you are unfamiliar with plumbing or electrical work. Improper installation can do more harm than good.
Be sure to check out our other essential crawl space guides.

