Are you tired of the annoying squeaking sound that emanates from your hardwood floor every time you walk on it? Is your family, or even your landlord, giving you grief about the noise? Whether you just moved into a new home or have lived in one for years, a squeaky hardwood floor can frustrate you to exasperation.
The blog will discuss the common causes of squeaky floors and solutions to fix them. From lubricants to targeted screws, we will provide you with the knowledge and tools necessary to tackle this problem head-on. Read on to learn more.
Common Causes Of A Squeaky Hardwood Floor
Several reasons can lead to a squeaky floor, including:
- Loose Subfloor: It can occur when the screws or nails used to attach it become wobbly or undone over time. Then, the subfloor movement when someone walks on it causes the squeaking noise.
- Improperly Installed Floorboards: If floorboards are not properly secured with nails or screws into the joists below, they can move and create a squeak when someone steps on them.
- Seasonal Problems: Wood is affected by humidity and temperature changes. Wood tends to expand or contract when the environment changes, which can cause nails to loosen over time. Also, if the floorboards rub against each other, they can create a squeaky noise.
- Joist Problems: When the joists move or rub against objects, they can create squeaky noises. This usually happens when floor joists are loose or damaged due to age, water damage, or other events.
What To Look For When The Floor Squeaks
The sound of squeaky floors results from wood rubbing against other wood or metal fasteners. It could be that your floor is moving on top of your subfloor, or your subfloor is shifting on top of the joists. To figure out exactly what’s causing the squeaking, you’ll need to examine the area beneath the floor in a crawlspace, unfinished basement, or basement with a drop ceiling.
Have someone flex the squeaky area while you look from below to check for any irregularities, such as an improperly secured subfloor, sagging joists, bowed joists, vertical or lateral movement of any kind, or any other loose or damaged components. By determining the root cause of the squeaking, you can fix it.
Quick Fixes For Noisy Floors
Before diving into more long-term solutions, it can be helpful to try some quick tricks that may help reduce the squeaking of your wood floors.
1. Increase The Humidity
If the air inside your home is dry, it can cause the wood in your floors becomes brittle and prone to squeaking. To counteract this, try using a humidifier to increase the humidity in your home. This may help reduce the noise from your floorboards. The gaps between your floorboards may also be expanding due to dry air, so increasing the humidity in your home can help prevent that.
2. Apply Powdered Graphite
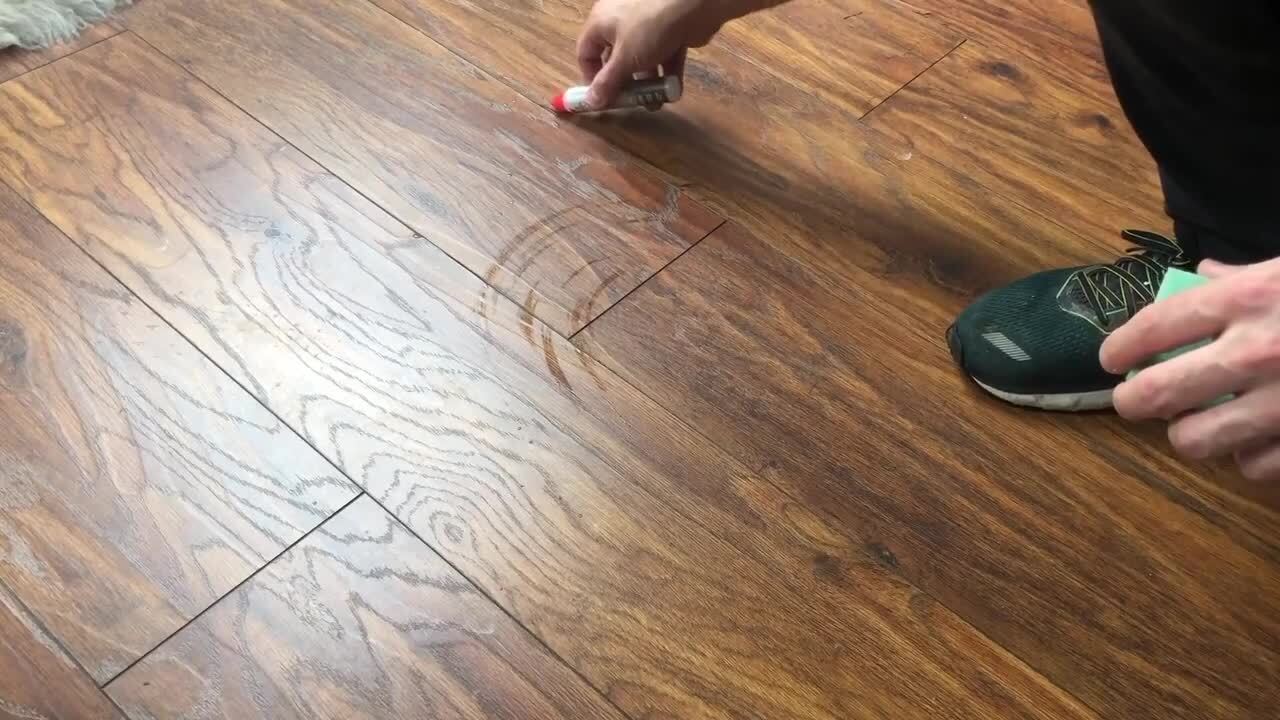
Powdered graphite is a great way to lubricate squeaky floorboards and reduce noise. Try sprinkling powdered graphite on the cracks between your floorboards, then sweep away any excess. Make sure it settles in the cracks between your floorboards. This should help reduce the squeaking and make it more bearable.
3. Spray A Wood-Safe Dry Lubricant
Another quick fix is spraying a wood-safe dry lubricant on the squeaking board joints. This will help reduce friction and noise while protecting the wood from moisture and dirt. Make sure to use a lubricant specifically designed for wood, as other lubricants may damage your floors. Also, be sure to test the lubricant on an inconspicuous area first.

DIY Methods To Fix Squeaky Floors
If the above tricks didn’t do the job, you might be able to take matters into your own hands and fix the squeaky floor on your own. Let’s go over a few DIY methods to try out.
Materials You Will Need
You will need the following materials to tackle fixing your squeaky hardwood floors:
- Shims: These are thin wood blocks that can fill any space between the floorboards and the joists.
- 2×4 Pine Board: You’ll need this section as it will act as a bridge between weak or damaged floorboards.
- Construction Adhesive or Glue: This will keep the shims in place and avoid further damage from nails or screws.
- Pencil: Use this to mark where you’ll need to drill holes, cut wooden planks, and apply adhesive or glue.
- Utility Knife: To carefully cut the 2×4 pine board to size.
- Drill: To create holes for screws and nails as needed.
- Drill Bits: You will need this to ensure you get the right drill bit size for your needs.
- Stud Finder: This tool will help you locate the joists beneath your hardwood flooring.
- Breakaway Screw Kit: Use this to protect your floors from over-tightening and causing damage.
- 2½-inch Self-Drilling Wood Screws: Attach the 2×4 pine boards to the joists below.
- 2-Inch Finish Nails: To attach shims in place and fill any gaps between the floorboards.
- Nail Set: To ensure that the nails are pushed into the wood at the proper depth.
- Hammer: Use this to drive the screws and nails into your hardwood planks.
- Wood Filler: This will help restore damaged boards or fill gaps between them.
- Sandpaper: To lightly sand and smooth out any rough edges or surfaces.
Once you’ve gathered all the necessary materials, it’s time to fix your squeaky hardwood floors.
a. Using Shims To Deal With Squeaky Spot
Below-floor access is the ideal way to deal with a squeaky hardwood floor. Shimming, or inserting thin wood between the joists and subfloor, can help tighten any gaps causing the noise. The steps include:
Step 1: Locate The Squeak
First, you’ll need to isolate the exact spot that’s squeaking. Move around the room and listen for any noise, then mark it on the floor with a piece of tape or chalk for easy reference.
Step 2: Shim The Joists
Once you have your spot identified, you’ll need to shim the joists. Using a hammer and thin wood (often sold as “shim stock”), slide the pieces between the joist and subfloor until it is securely placed.
Step 3: Apply Adhesive and Reinsert The Shims
Once the shims are in place, use wood glue to secure them. Allow the adhesive to dry thoroughly before reinserting the shims. Ensure that the pieces are level with the floor to avoid further noise.
b. Reinforce A Joist With A Wood Block
A wood block is the most effective way to reinforce a damaged or weakened joist. It requires using a saw, screws, and some knowledge of carpentry.
Step 1: Measure the Damage And Cut Support Block
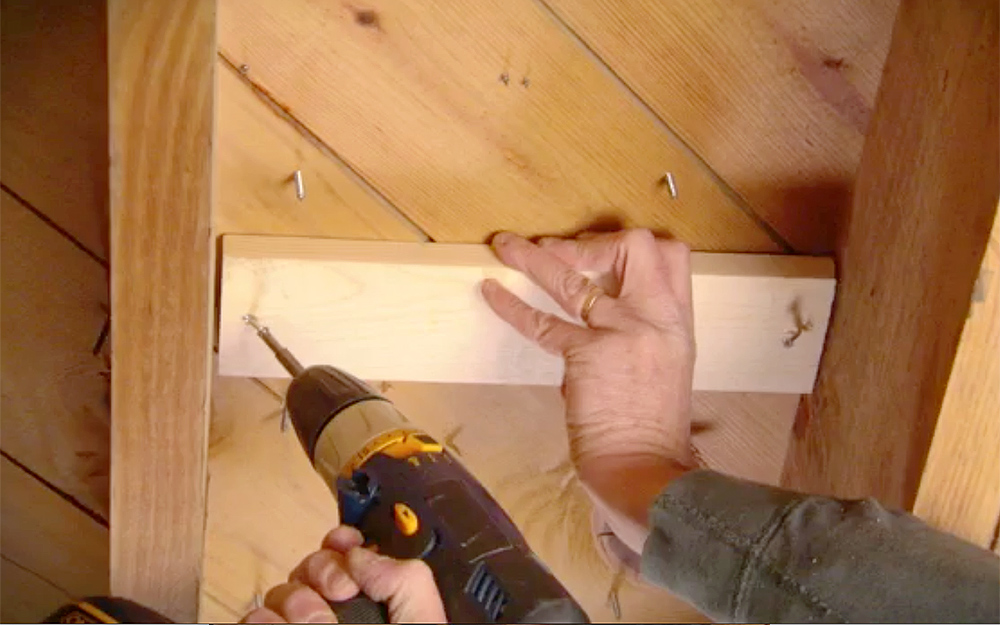
Measure the damaged joist to determine how much support is needed. Cut a piece of wood – usually a 2×4 or 4×4 – into a supportive block that fits snugly alongside the joist. You may need to drill holes in the block for screws.
Step 2: Fasten The Support Block
Using screws, fasten the block securely to the joist. Be sure that it is flush with the side of the joist and that its ends are even with the end of the joist. Drill pilot holes into both ends of your block before screwing them in place to prevent splitting.
Step 3: Secure The Joist
To reinforce the joist, you can use a combination of screws and nails. Drive nails several inches into the wood block and joist, using galvanized or coated nails to prevent rusting. Screws should be driven in at an angle, deep into the wood, so they are flush with the surface.

c. Secure Flooring From Above
If you can’t access the flooring below, you may need to secure it from above. To do this, you will need to access the joist above the squeaky area. Joists are typically placed 16 inches apart and provide a solid platform for your subflooring. Here’s how to secure the flooring from above:
Step 1: Locate The Joist
Use a stud finder to locate the noisy joists above the squeaky area. If you don’t have a stud finder, you may be able to use a hammer and tap along the ceiling until you hear a solid sound that indicates it is hitting a joist. Mark the spot with a pencil or marker.
Step 2: Drill Pilot Hole
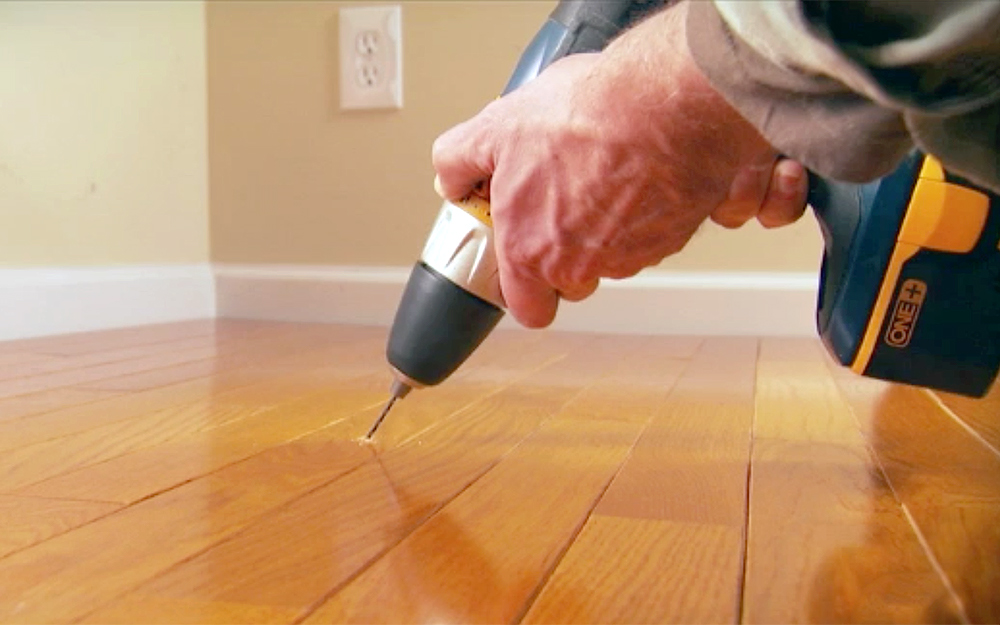
Once you have located the joist, drill a pilot hole through the subflooring and into the joist. This will help to secure the screw without damaging the wood in either location. Ensure that your drill bit is not too large, as you don’t want the screw to thread into the wood.
Step 3: Drive The Screw
Finally, drive a screw through the pilot hole and into the floor joist. This will secure the subflooring in place and reduce any squeaking that may have been occurring. Test it out by tapping on the floor in different areas to ensure it is secure. If there is still movement, try adding a second screw for further support.
FAQs
1. How To Screw The Subfloor to the Finished Floor?
The best way to screw the subfloor to the finished floor is by pre-drilling holes through it and into the subfloor, then securing it with screws. Be sure to drill pilot holes slightly larger than your screws so they fit snugly and won’t strip out. Additionally, make sure to use screws that are long enough to penetrate both the subfloor and the finished floor.
2. Can Squeaky Floor Be Repaired Without Removing The Finish?
Yes, in some cases, you may be able to repair a squeaky hardwood floor without removing the finish. Try using a rubber mallet to tap the floorboards together and reduce noise, or use a combination of shims and glue between floorboards to fill any gaps. If neither of these solutions works, you may need to remove the finish and start over.
3. How Can I Prevent My Hardwood Floor From Squeaking Again?
To prevent your hardwood floor from squeaking again, ensure that all the nails and screws used are properly secured and don’t come undone. Additionally, use a high-quality adhesive between floorboards and make sure they’re firmly pressed together. Regularly inspect the floor for any movement or gaps so that you can make quick repairs as needed.
4. Is It Necessary to Refinish Hardwood Floors After Fixing Squeaks?
Refinishing isn’t always necessary after fixing squeaks, but it may be beneficial depending on the extent of the repair and damage done. If you had to remove any finish or boards, refinishing may be necessary to protect the floor and restore its appearance. It’s best to consult a professional if you’re unsure whether your floors need refinishing.
5. What Can I Do If My Subfloor Is Damaged?
If your subfloor is damaged, you’ll need to either replace it or repair it. Replacing it is often the best option, as repairing it can be difficult and time-consuming. If you decide to repair the subfloor, secure loose boards with screws and fill any gaps with a caulking gun or adhesive. Additionally, ensure the floor is level before covering it with a new finish.
Summing Up
From identifying the root cause to removing the squeak in hardwood floors, we have provided all the necessary information to fix your flooring issues. Squeaky hardwood floors are an annoying and often expensive problem to solve, but with knowledge about possible causes and fixes, you can keep them in top shape for many years.
Taking the time to maintain your hardwood flooring properly can save you money and headaches in the long run, so don’t hesitate to take action if you are experiencing any annoying creaks or squeaks. You can easily fix the issue with patience and simple techniques without replacing your floors entirely.


