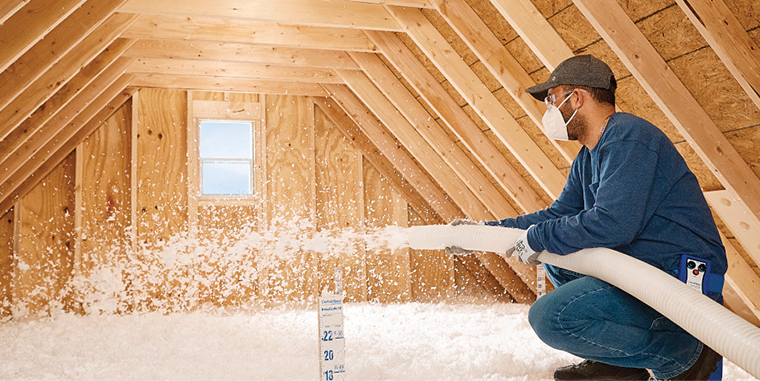
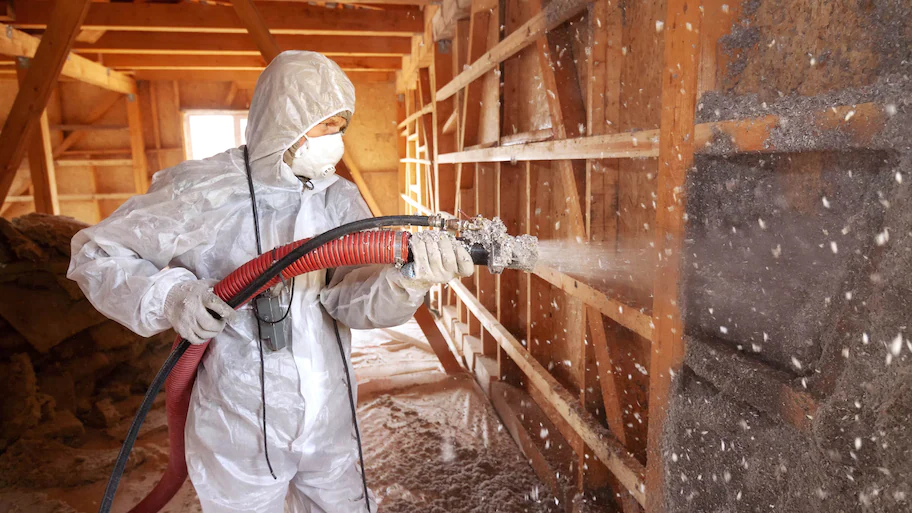
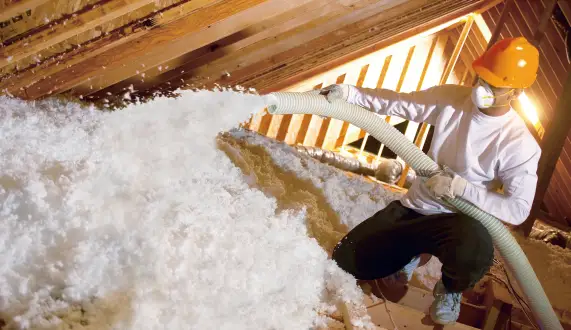
Insulating your home is a great way to reduce energy costs and improve the comfort of your living space. Blown in insulation is an excellent option for those looking for an efficient and cost-effective solution. This type of insulation best suits unfinished walls, attic floors, cathedral ceilings, or other hard-to-reach areas within the house.
For the uninitiated, it can be hard to understand how blown in insulation works and what type of installation is best for your home. The article will discuss the different types in detail, including installation methods and costs associated with each option. Let’s get started.
Types of Blown In Insulation
Before installation, it is important to consider the different types of blown in insulation. Common materials include fiberglass, cellulose, and rock wool. The details include the following:
1. Fiberglass Blown In Insulation
It consists of finely spun glass and is available in different forms like loose-fill, pellets, and bats. It is the most popular and cost-effective option available on the market today. Fiberglass insulation can help reduce energy bills by trapping air particles that help regulate indoor temperatures. It is most suitable for installation in higher-temperature environments.
2. Cellulose Blown In Insulation
Cellulose insulation is made from recycled paper and is sprayed into place with a blower machine. It offers great fire resistance and soundproofing capabilities, making it ideal for walls and attics. The material should be installed correctly to ensure proper coverage, as the material can easily settle over time. Also, its installation requires special equipment and expertise.
3. Rock Wool Blown In Insulation
This material is made from volcanic rock that has been melted, spun, and cooled. It offers excellent fire protection and soundproofing qualities, making it a great choice for walls or attics with a fire risk. Rock wool also takes longer to settle, making it less likely to lose its effectiveness over time. The fire resistance of rock wool means that it can be used in more hazardous environments. Unaffected by moisture, it is ideal for use in humid climates.
How To Install Blown-In Insulation?
Tools And Materials Needed
- Before installing blown-in insulation, you’ll need the right tools and materials. Depending on your specific project, these items may vary, but typically needed are:
- Blower Machine: It blows insulation material into the desired area. It is powerful enough to force the material into even hard-to-reach areas.
- Caulk Gun: This tool spreads caulking and fills gaps in wall cavities or around windows and doors.
- Dust Mask: To protect your lungs, you should always wear a dust mask when working with insulation.
- Flashlight: This is essential for inspecting tight places and dark corners that may otherwise be hard to see.
- Hose: A long hose can blow insulation into hard-to-reach areas such as behind walls or crawl spaces.
- Leather Gloves: It is important to wear gloves when handling insulation as they may contain sharp fibers irritating the skin.
- Safety Glasses: Wear safety glasses to protect your eyes from flying debris.
- Shop Vacuum: A shop vacuum is necessary to clean up any remaining dust or debris after installing the insulation.
- Stapler: It is essential for stapling vapor barriers and plastic sheeting to walls or other surfaces.
- Trouble Light: A trouble light can be used for inspecting areas in tight spaces, such as attics or basements.
- Utility Knife: A heavy-duty utility knife is needed to cut holes in the wall or trim plastic sheeting.
- Caulk: Caulk can fill gaps and cracks in walls before or during insulation installation.
- Cellulose Insulation: This type of insulation comes in small pellets and is commonly used with a blowing machine. You can also use fiberglass batt insulation.
- Duct Tape: Duct tape is used for sealing seams and joints and connecting pieces of vapor barriers.
- Expanding Foam: The foam can be sprayed or injected into tight flanges, cracks, or gaps to help seal them from the outside environment.
- Vent Chutes: These are designed for routing venting ducts through walls and ceilings.
The right tools and materials will make the installation process easier, faster, and more effective. Check your local hardware store for any special items you may need before embarking on this project.

Step 1 – Seal Attic Bypasses
Ensure that you are taking care of any attic bypasses that may be present. Bypasses can occur in areas such as the attic floor, soffit vents, walls, and ceiling. These areas need to be sealed with caulk or weatherstripping to prevent air from leaking and reduce energy bills. You can also look for gaps in the attic floor and fill them with expanding foam filler.
Step 2 – Install Or Repair Vent Chutes
Vent chutes are a great way to prevent air from escaping out of the attic and into your home. Ensure that any existing vent chutes you have installed are properly working and free of debris. If not, consider replacing them with new ones as needed. In addition, if you don’t have any installed, consider getting some, as they can help improve airflow in the attic and reduce energy costs.
Step 3 – Dam And Insulate the Attic Access
Ensure that you are damming up your attic access properly so that cold air doesn’t enter your home. You can also insulate around the attic access to help keep warm air from escaping. Doing this will not only save on energy costs, but it will also make for a more comfortable living space. Also, make sure that you are using the right type of insulation around the access to ensure your safety.
Step 4 – Install Blown In Insulation
Now that your attic is properly sealed, vent chutes, and damming up the access, it’s time to install blown in insulation. This type of insulation comes in various materials, such as fiberglass batts, cellulose, and rock wool. It can also be used for walls, ceilings, and other areas in the home, depending on where you need it most. Depending on where you live, blown in insulation can be purchased at your local hardware or home improvement store. Make sure to follow all instructions and safety protocols when installing this type of insulation.
Step 5 – Inspect And Test The Installation
Once the installation is complete, inspect the insulation and ensure it is installed properly. You can use a digital thermometer to test the temperature in different areas of your home. This will help you determine how effective your insulation is and if it needs any additional adjustments for optimal performance. Also, check for any gaps or air leaks that may have occurred during installation and fill them in with expanding foam filler.
Step 6 – Monitor To Maintain Efficiency
Ensure that you are regularly monitoring your insulation to ensure it is performing efficiently. This can involve inspecting the attic for new air leaks or making necessary adjustments. You can consider having a professional come and inspect your insulation every few years to help ensure you are getting the most out of it.
Blown In Insulation Cost By Square Foot
For a typical installation project, expect blown in attic insulation to cost between $1.00 and $1.50 per square foot. The actual costs may vary based on the complexity of the project or the thickness of insulation needed. Depending on location and other factors, labor charges can range from $40 to $70 per hour. Remember that longer projects will require more work hours and, thus, higher installation costs.
- Attic Insulation Costs: Blown in insulation installation can range from $600 to $1,200 per 1,000 square feet for a typical attic. This cost covers an R-30 insulation value and a 10 to 14-inch thickness.
- Wall Insulation Costs: The price for blown in wall insulation is higher. On average, expect to pay between $1,000 and $1,500 per 1,000 square feet of actual wall space (not floor space). The typical walls are framed with 2x6s and will provide an R-21 insulation value depending on how densely packed the insulation is.
Some additional costs and considerations should be considered regarding blown insulation. If the contractor needs to move items around an attic, they’ll charge the same rate as time spent insulating. So, moving personal items and boxes beforehand will save money.
Additionally, certain repairs, such as fixing leaks or dealing with mold, may be needed during the process. These repairs will cost extra, and the insulation contractor might need to be qualified to do them. To avoid any issues, it’s important to plan and anticipate these possible hiccups.

When To Avoid Blown In Insulation?
Apart from the benefits of using blown in insulation for walls, there are certain conditions when it is not recommended.
- If the wall surface is made from brick or stucco, the plugs used to seal the drilled holes may be visible and detract from the overall look.
- If a wall space contains obstructions such as drain pipes, outlet boxes, or supporting boards between studs, then the insulation will be unable to fill out the entire space, leaving a void with no insulation.
- Over time, the blown in insulation may settle down by a few inches due to gravity, thus reducing its thermal resistance (R-value). While additional insulation can be added, most homeowners opt not to do so due to the small area affected.
FAQs
1. Is Blown In Insulation Worth It?
For homeowners looking to increase the energy efficiency of their homes and reduce their utility bills, blowing insulation is worth it. Blown in insulation can provide a higher R-value than many other types of insulation, making it an effective and cost-efficient way to insulate your home.
2. Should I Remove Existing Insulation Before Installing Blown In Insulation?
It is recommended to remove old insulation if it has been damaged, has reached the end of its useful life, or if you are installing a different type of insulation. Before removing old insulation, it is important to take safety precautions, such as wearing protective clothing and using a respirator mask. If it contains asbestos, it is important to contact a professional for removal.
3. How Long Does Blown In Insulation Last?
Blow-in insulation can last up to 30 years, depending on the type and quality of insulation used. It is important to ensure proper installation techniques are used to maximize the lifespan of the insulation. Regular inspections should also be done to check for signs of wear and tear.
Conclusion
Blown in insulation is an effective and efficient way to insulate your home. It can be used for both attic and wall spaces, allowing you to customize the level of insulation in each area. Additionally, it can be installed quickly with minimal disruption to your home, making it a convenient choice for insulating your property.
Whether you’re looking to boost energy efficiency or improve comfort, blown in insulation can help you cost-effectively meet your goals. With the right installation, you can enjoy improved energy savings and increased comfort in no time.


